Creating & Sharing Reports
Generate a patient report, choose which sections to include, and share it by print, PDF, or email.
Creating a report
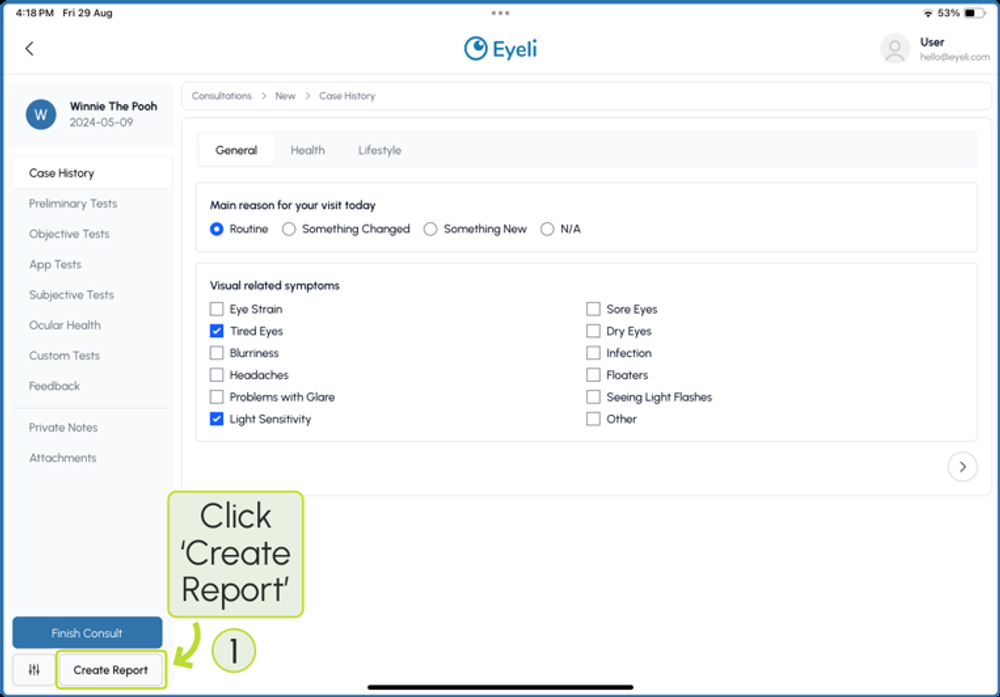
- Under the patient's consultation, click Create Report.
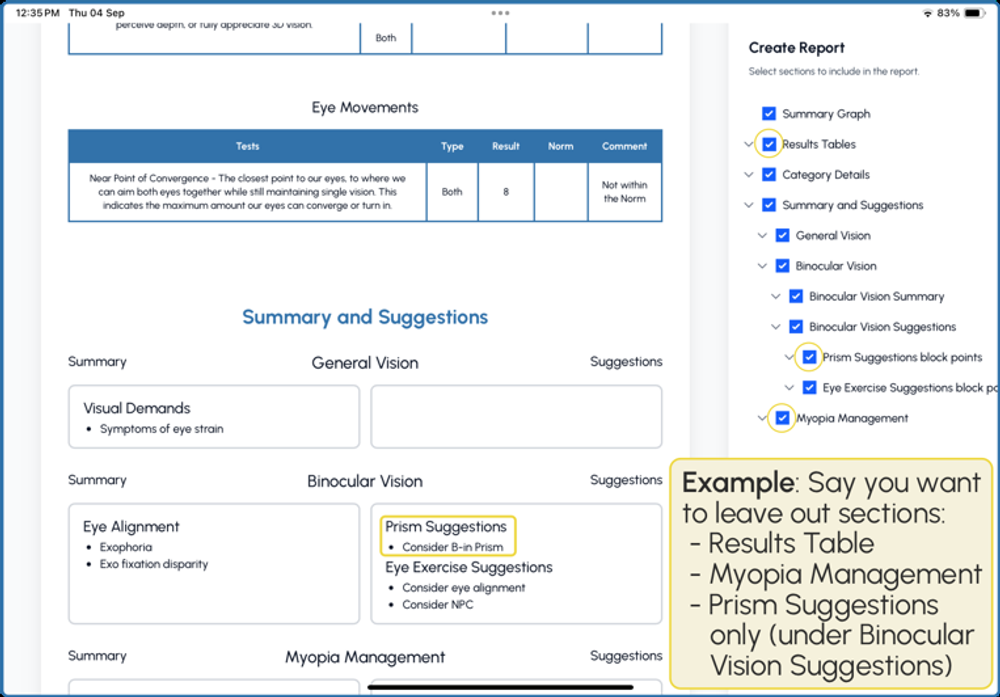
- Customise your report by selecting or deselecting sections - Summary Graph, Results Tables, Category Details, Summary and Suggestions, and their sub-sections.
- Once complete, click Finish.
- Click Cancel instead, if you are not sharing the report at this time.
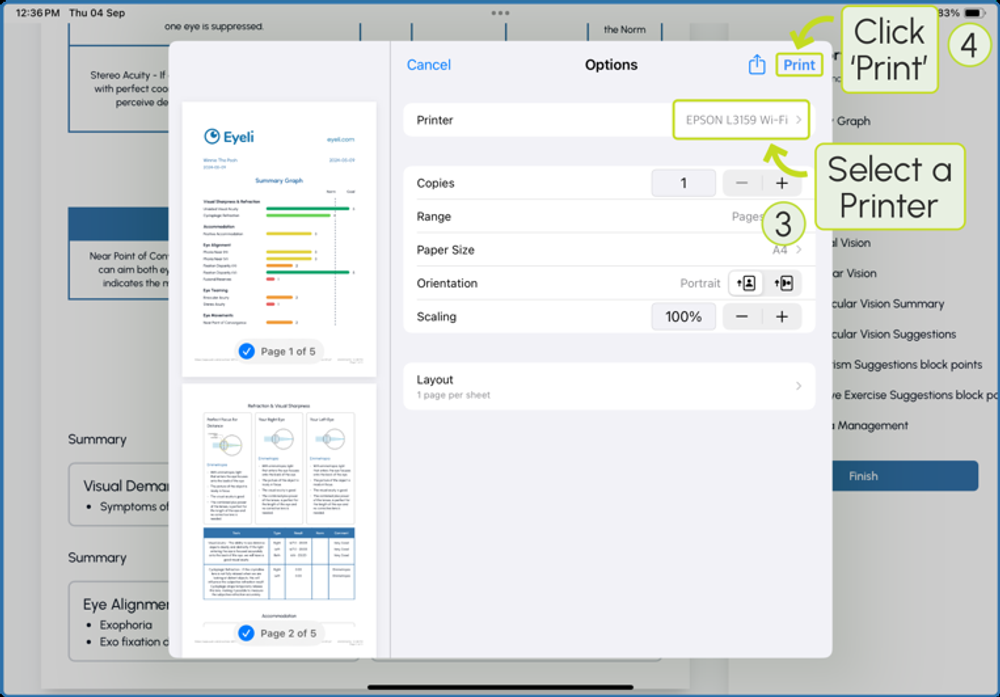
Printing a report
- Under the patient's consultation, click Create Report, then Finish.
- Select a printer and click Print.
Saving a PDF report - computer
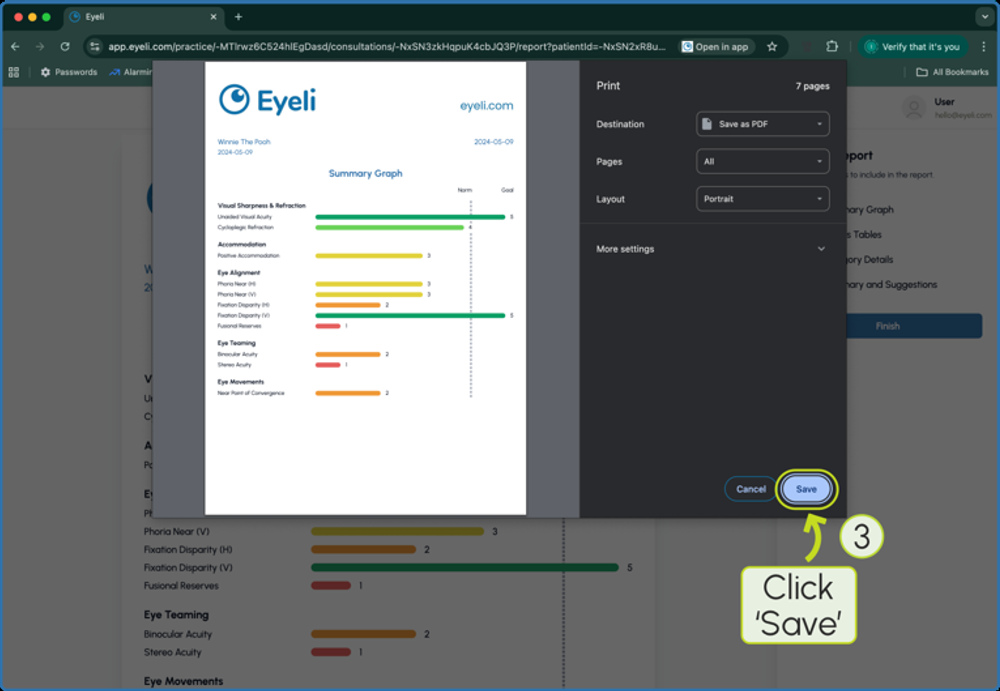
- Under the patient's consultation, click Create Report, then Finish.
- Click Save and choose where to save the PDF on your computer.
Saving a PDF report - tablet
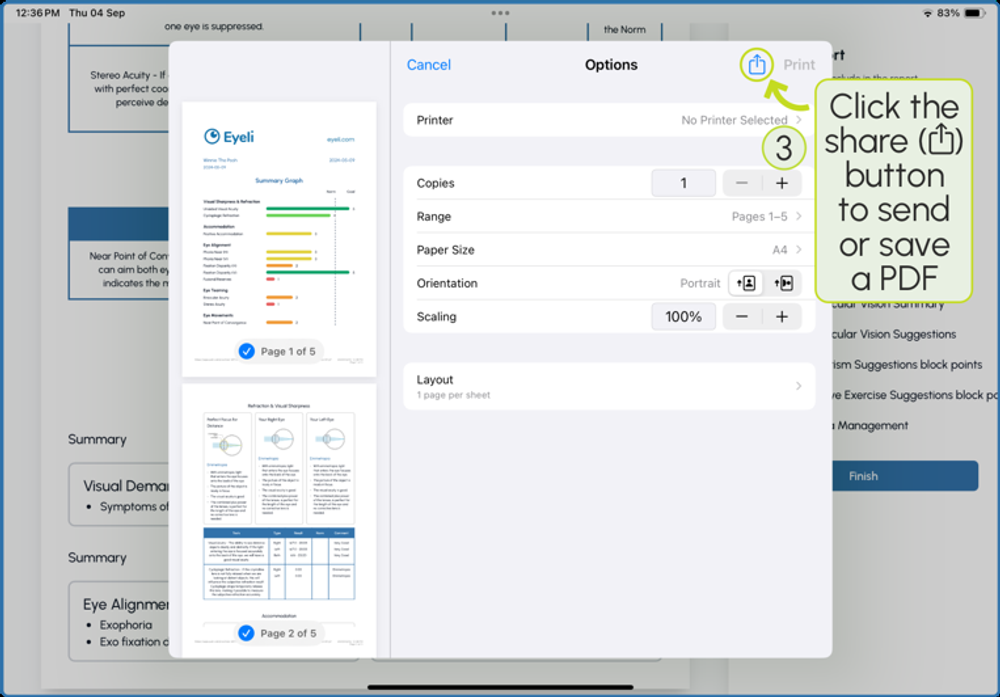
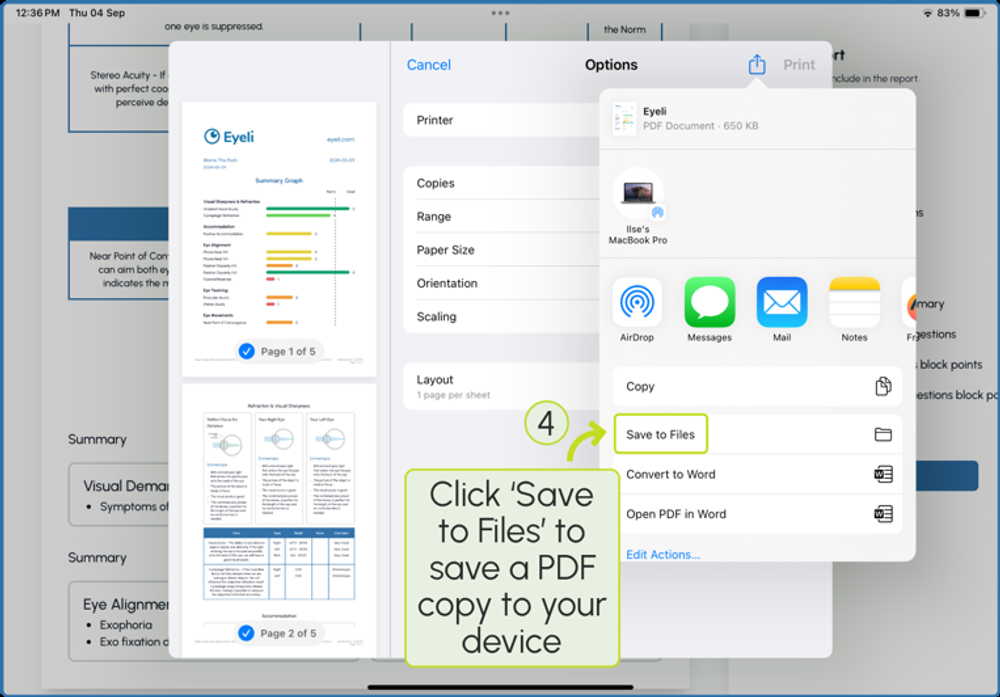
- Under the patient's consultation, click Create Report, then Finish.
- Click the Share icon.
- Select Save to Files.
Mailing a PDF report
- Under the patient's consultation, click Create Report, then Finish.
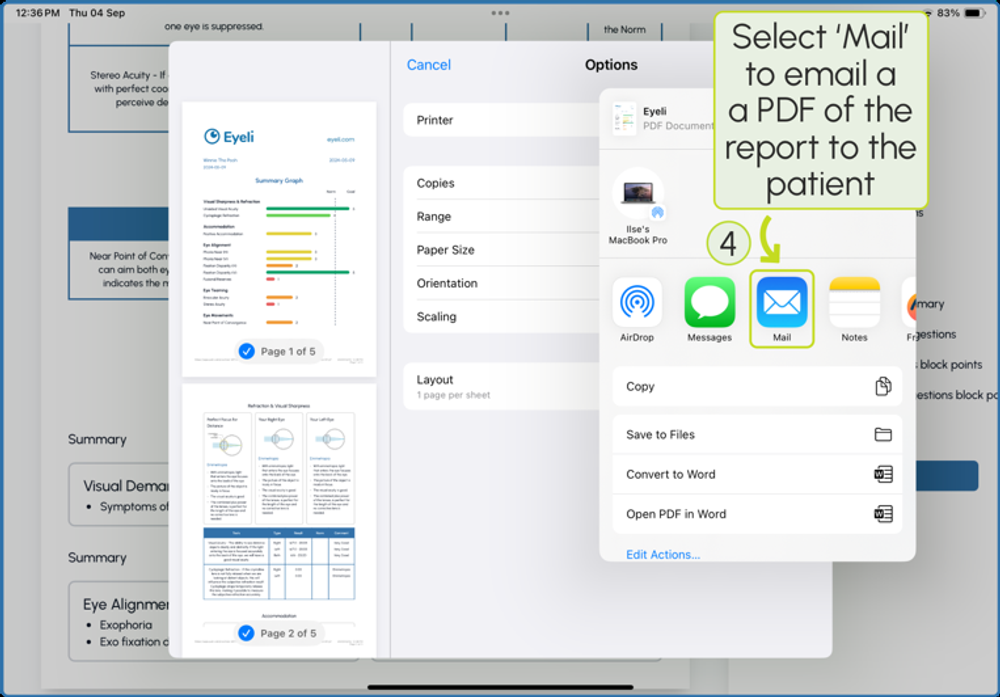
- Click the Share icon and select Mail.
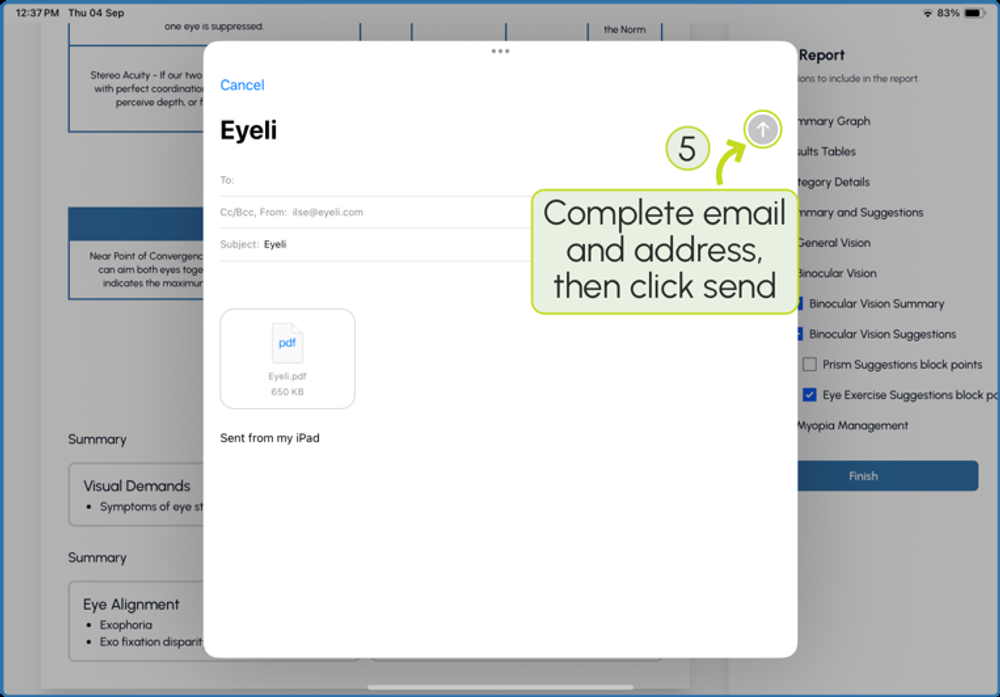
- Complete the email address and send.
Quick email copy and paste
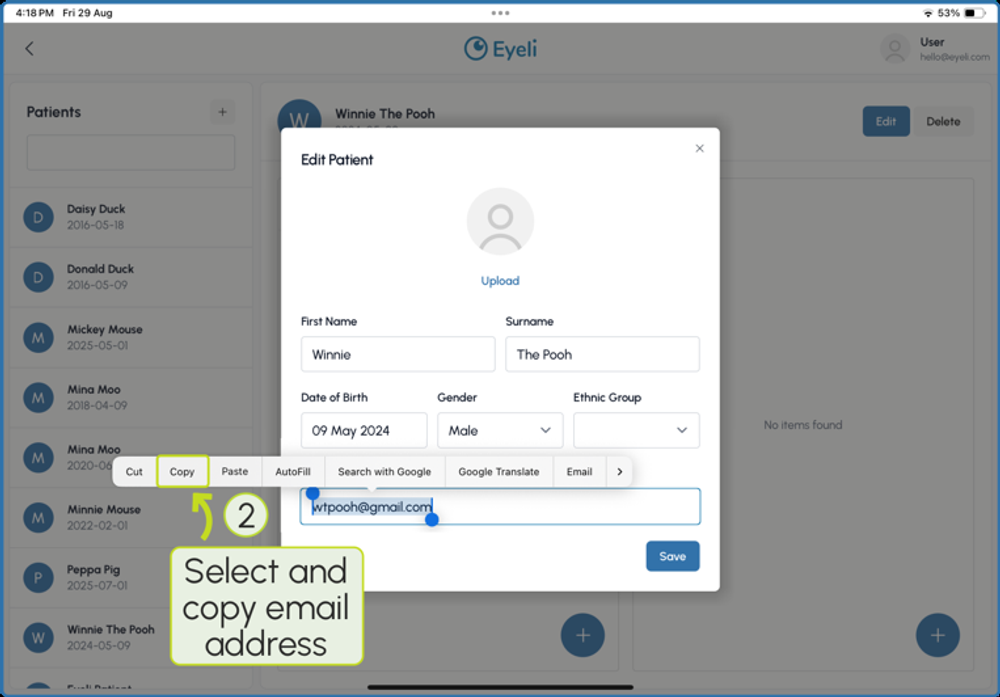
If you don't have the patient's email address on hand, you can copy it directly from their profile.
- Click Edit on the patient's profile.
- Select and copy the patient's email address.
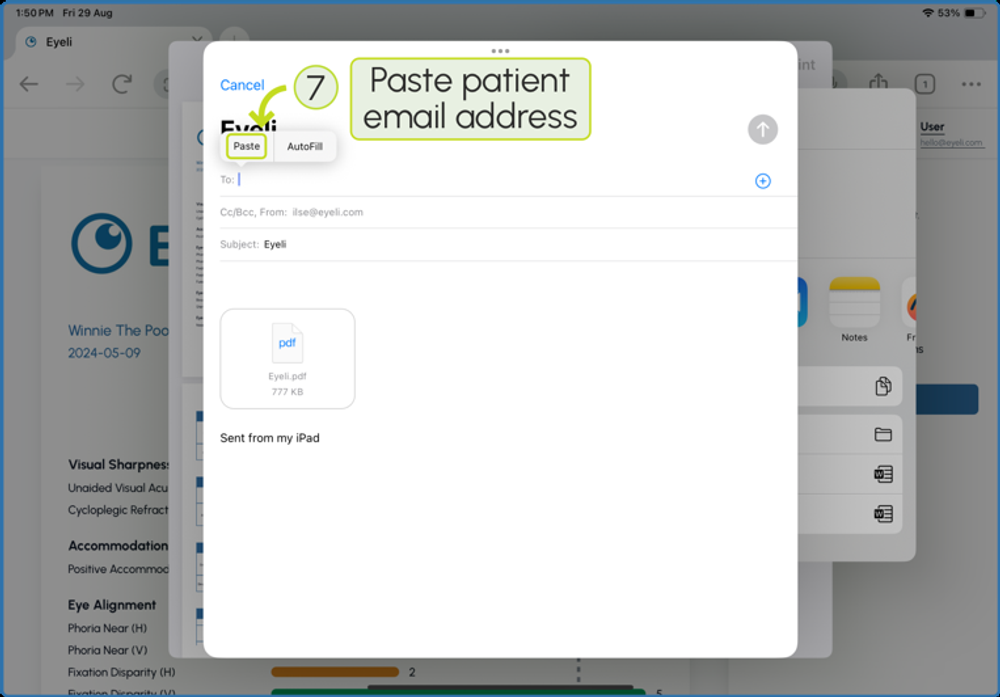
- Click Create Report, then Finish, then the Share icon, and select Mail.
- Paste the patient's email address and send.